
IMPORTANT advice on using the system * Please read first
Keep us up to date. When we get calls from tenants and landlords asking for an update we want to be able to look at the system and see the very latest progress. We do not wish to keep calling you - it wastes valuable time.
You can attach a written quotation/estimate to a message from you. If it’s a smallish job then the quote description and prices can be written into the message.
Photos can also be attached to a message (a picture is worth a thousand words!).
Landlords and tenant will also be able to see certain parts of this system so ensure your messages/comments are informative and clean.
Accessing the contractor repairs system
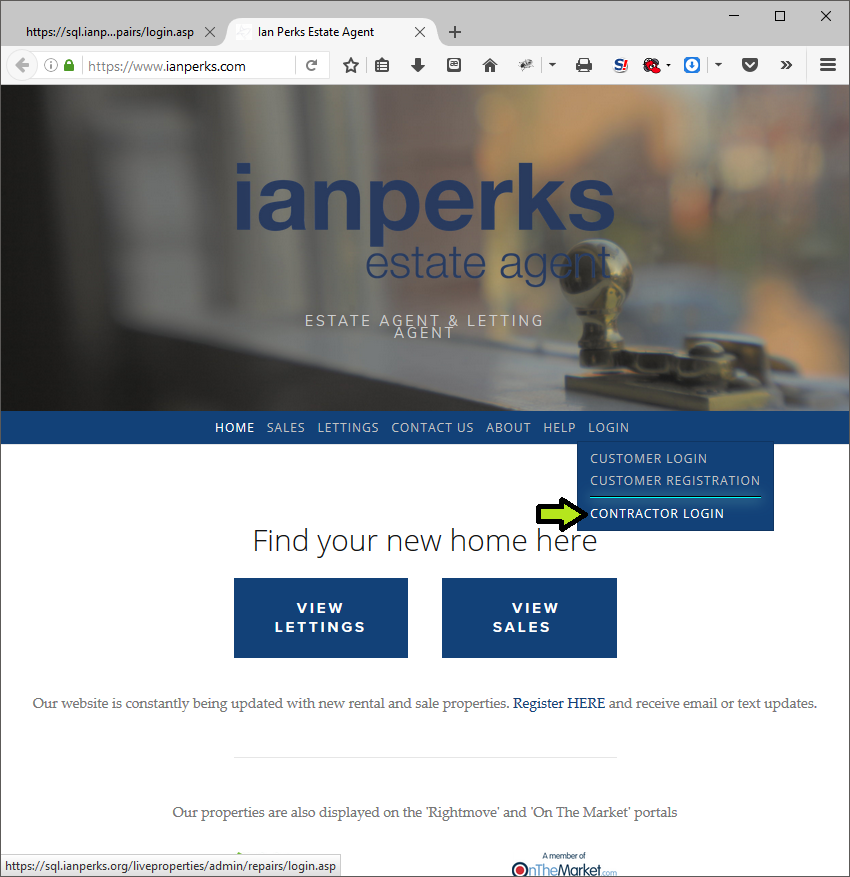
You can gain access to the contractor repairs system by visiting the Ian Perks website ianperks.com
Located on the menu bar there is an option called "LOGIN", which you can click, and towards the bottom of the menu that pops-up you will find the link "CONTRACTOR LOGIN", click on this to be taken to the contractor login page.
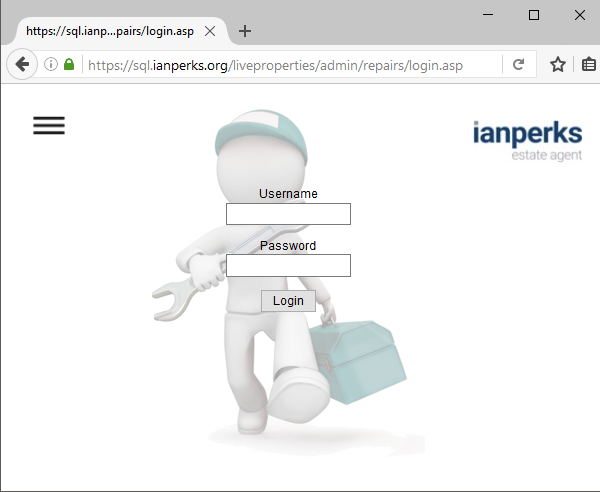
This is the login screen for our contractor repairs system, You must enter your username and password into this form to proceed. If you do not have, or can't remember your account details please contact our reception staff who will be able to get you set-up and running.
Viewing the list of active/completed jobs
When you first log in, you will be able to see the list for all of your current jobs, this list can be sorted in various ways using the Sort By and Sort Direction menus.
By default only active jobs are listed, but you can change the view to list out the history of jobs you have completed, or been paid for.
Click on any of the jobs in this list will then open up the full details about the job you selected
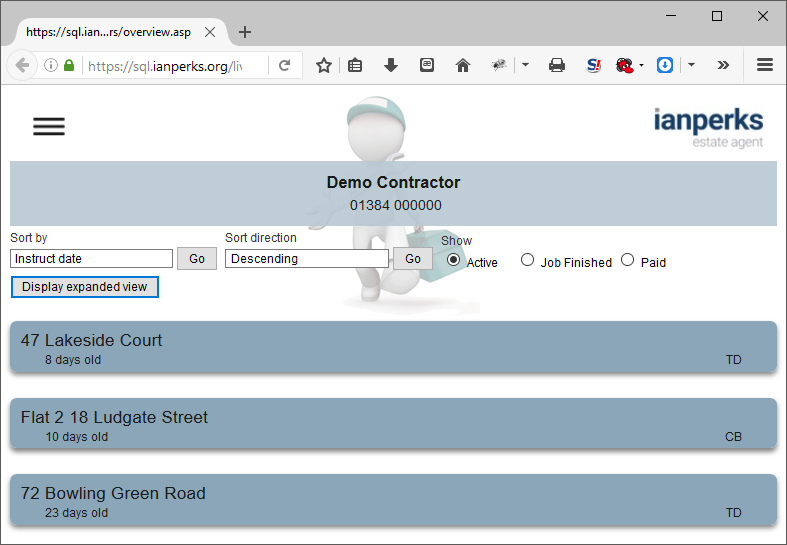
To help save space we only show the address and age of the job by default, but you can expand the amount of details presented on this list by clicking on the "Display expanded view" button
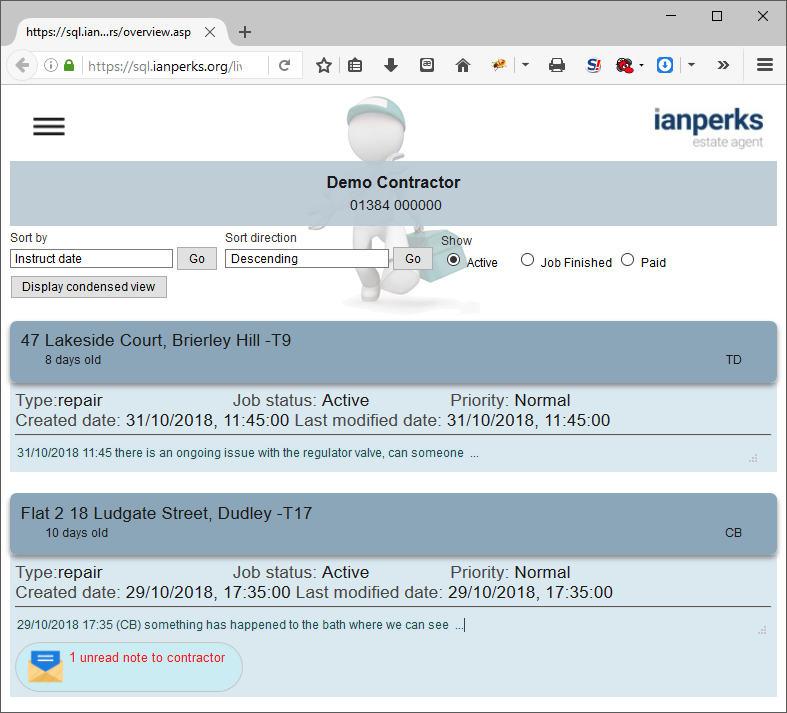
from this view we can see that our office staff have posted a message against this job which the contractor has nopt yet viewed. When you click on the job to open up its details page, you will be able to scroll down to see your new messages
Selecting a specific job
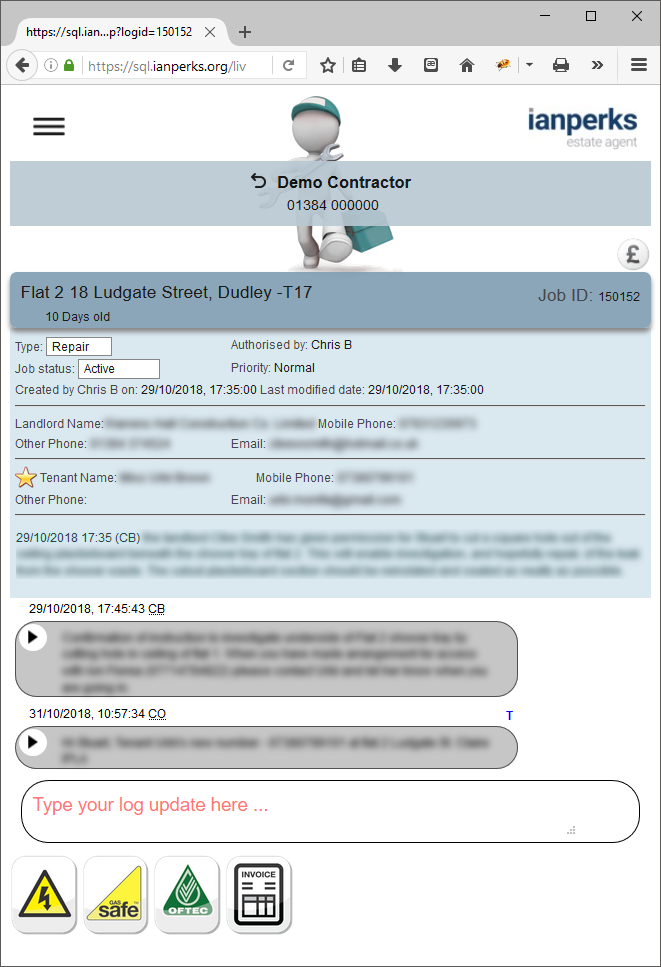
By clicking on any of the jobs from your job list, you will be brought to the job details page, that includes information on the current state of the job, This includes landlord and tenant contact details, a description of the job, the message history between yourself and our office staff, and also any attached certificates that you have uploaded to us.
Communicating with us
Your job details page includes a messaging system, that allows you to communicate with us, and also for us to make contact with you in relation to specific jobs.
Any messages that are coloured in grey and that appear on the left of the page are messages that our staff have submitted to you
Any messages that are coloured in blue and that appear of the right of the page are messages that you have posted to us.
To contact us just type your message into the space provided towards the bottom of the page

Once you have typed your message hit return on your keyboard, or click the send button that appears to the right of the message

Attaching files to your messages
After you have posted a message to us, the page will refresh, and you will see your message towards the bottom of the conversation history. There is a black triangle inside of a white circle that you can click on. This will allow you to attach files to your message. This upload ability is limited for use within your most recent message to us

You can attach files of various types, documents, photos, videos, etc. But please refrain from attaching invoices or certificates in this way, as we have dedicated buttons towards the bottom of the page, that should be used for these types of documents.
There is no limit as to how many files you can attach to a message, each upload will increase the attached file counter
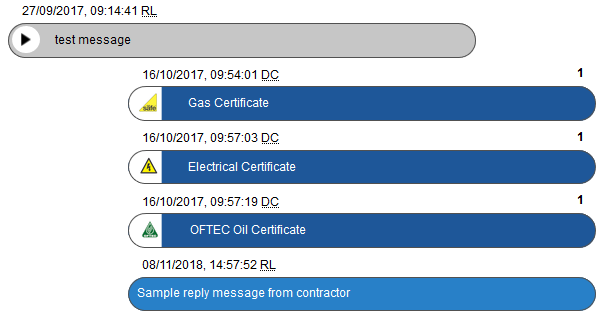
Viewing attached files inside of our messages to you
Any message that has had file(s) attached to it, will display a count of the number of files towards the top right of the message

Clicking upon this number will pop-up a menu allowing you to see all files that have been attached

You can attach files of various types, documents, photos, videos, etc. But please refrain from attaching invoices or certificates in this way, as we have dedicated buttons towards the bottom of the page, that should be used for these types of documents.
clicking any of the file links will either open the file for view, or download it to your device
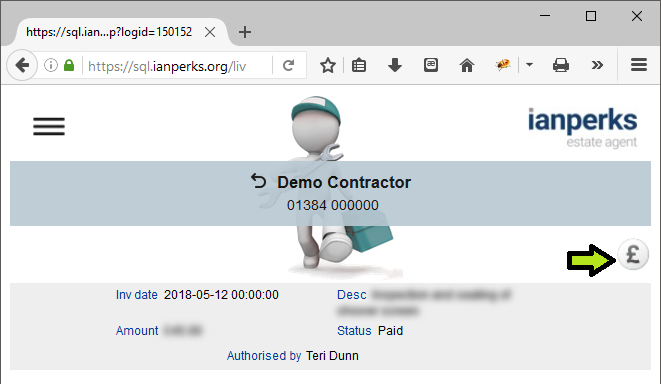
Payment history
If you see a pound £ symbol above the job details you can click on it to view the history of any payments that we have made to you relating to this specific property
Submitting Electrical/Gas/Oil Certificates
At the bottom of the job details page, there is a set of four icons, three of these should be used to attach copies of any certificates that have been issued to this property in relation to this job.
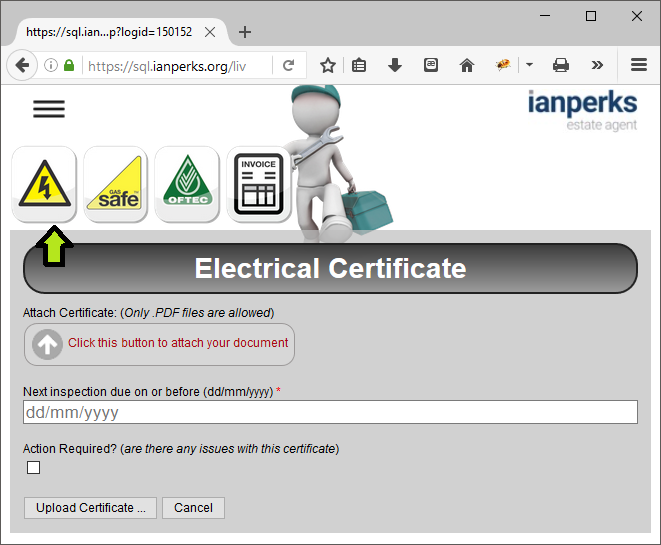
Please make sure that you attach the certificate by using the "Click this button to attach your document" file upload button. Then fill out the remaining fields on the form, and once you are ready, click on the "Upload Certificate ..." button, to post your form to us. It will then appear as part of your message history to us.
Submitting Your Invoice
Attaching your invoice works in the same way that Electrical/Gas/Oil certificates are uploaded. We just have a slightly different form (see below)
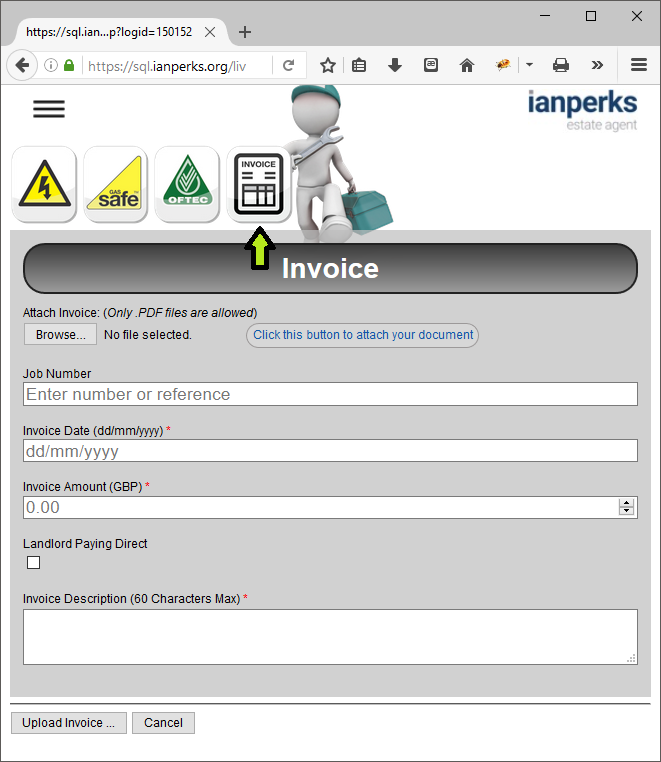
Any fields marked with a red * are required, and will need to be completed before you try posting the form.
When entering your amount please do not enter the £ symbol, or any comma's, only numbers and a single decimal point should be used.
Once you have complete the form, you should click upon the "Upload Invoice ..." button to post this form to us, it will be added to your message history